 Save
Save The first time I decided to make these mini cheesecake bites was on a rainy Saturday when the power flickered and I nervously watched the oven, half-expecting to finish them by candlelight. The scent of melting chocolate and creamy filling mingled in my tiny kitchen, and I found myself sneaking stray crumbs of Oreo crust before I'd even pressed them into the pan. There's a kind of mischievous fun in making dessert that's perfectly poppable and delightfully shareable. These are the treats friends gravitate to at gatherings, vanishing before you even serve coffee. Little did I know they'd become a cheerful staple for birthdays and evening cravings alike.
I once brought a box of these to a friend's backyard get-together, and halfway through the night someone loudly declared they should be illegal. We laughed as the kids tried (unsuccessfully) to sneak extra ones onto their plates. I still remember the debate over toppings—two friends swore by berries, while another kept swiping every cheesecake with extra chocolate chips. That lighthearted tug-of-war over the last bite made the evening feel extra sweet. These bites always seem to spark new conversations wherever they’re served.
Ingredients
- Oreo cookies: Use the whole cookie, filling and all—the added sweetness in the creme makes the crust stick together perfectly.
- Unsalted butter: Melt it just before mixing for easy coating; it gives your crust that toasty, rich finish.
- Cream cheese: Softening it fully prevents lumps and ensures your cheesecake filling is smooth and dreamy.
- Granulated sugar: I learned that measuring with care keeps the filling just sweet enough without overwhelming the tang of cream cheese.
- Eggs: Bring to room temperature so they blend seamlessly and give the perfect velvety texture.
- Vanilla extract: Just a teaspoon lifts the flavor and adds warmth—don’t skip it.
- Sour cream: Its gentle tang balances everything and helps create a creamy bite.
- Salt: Even a pinch makes each flavor stand out and keeps the dessert from tasting flat.
- Mini chocolate chips or chopped Oreos (optional): For extra charm and crunch—scatter them generously on top.
- Fresh berries (optional): For a fresh, bright finish, especially lovely in summer.
Tired of Takeout? 🥡
Get 10 meals you can make faster than delivery arrives. Seriously.
One email. No spam. Unsubscribe anytime.
Instructions
- Prep Your Pan:
- Line your mini muffin tin with paper liners; hearing the crinkle as you place each one is oddly satisfying.
- Make the Oreo Crust:
- Crush the Oreos in a food processor and stir in melted butter until it clumps together—sneak a taste if you must.
- Fill and Bake the Crusts:
- Press about a tablespoon of crust into each cup, packing it tight so it bakes firm, and slide them into the oven for 5 minutes.
- Mix Cheesecake Filling:
- Using an electric mixer, beat softened cream cheese until creamy, then add sugar, eggs one at a time, vanilla, sour cream, and a pinch of salt—pause to marvel at the silky batter.
- Fill and Bake Bites:
- Spoon batter nearly to the top of each cup, then bake until set but a little wobbly in the center—no peeking if you can resist.
- Cool and Chill:
- Let the bites cool in the tin before chilling in the fridge for at least an hour; the anticipation is always the hardest part.
- Add Toppings:
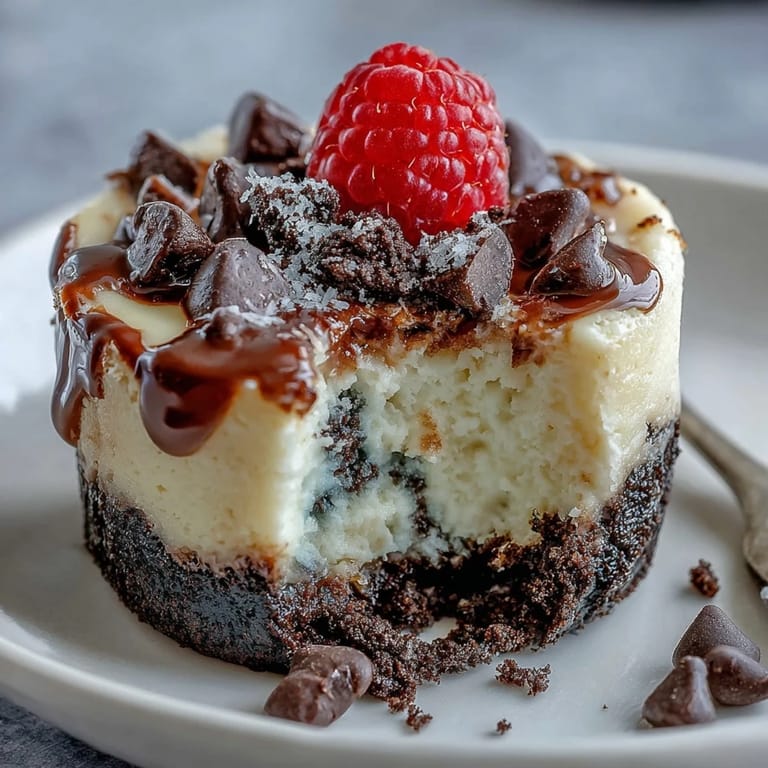
- Once chilled, crown each cheesecake with mini chocolate chips, extra Oreo bits, or fresh berries and watch them transform into irresistible gems.
 Save
Save 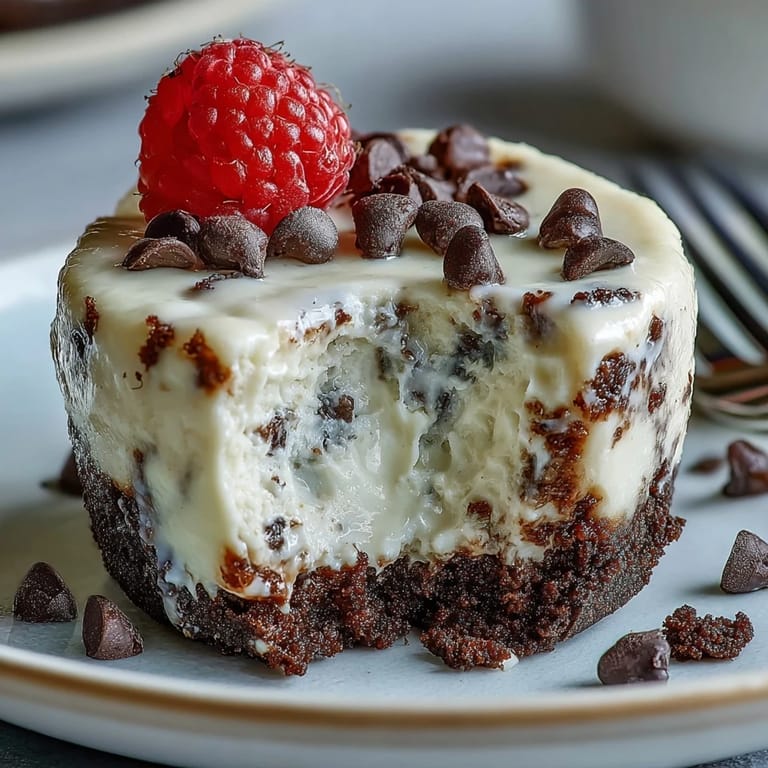 Save
Save There was one afternoon when my niece helped me sprinkle the toppings and wound up taste-testing nearly as many as she dressed up. Our laughter bounced around the kitchen, and it struck me how these mini bites somehow make baking feel effortless, even on the busiest days. More than once, a tray has vanished before I could take a decent photo. I’m always reminded that some of the best moments happen when you let go of perfection. Eventually, they became our unofficial celebration treat, no matter the occasion.
How To Store and Freeze
After plenty of trial and error (and a few sticky liners), I learned these cheesecake bites keep best in an airtight container with paper towels layered between. If you’re making ahead, freeze them on a baking sheet first, then transfer to a box so they stay neat and don’t clump together. They thaw quickly, and the flavor actually intensifies after a day or two in the fridge. Whether stashed for a rainy day or handed out after dinner, they hold up beautifully. Remember to let them warm a bit for the creamiest bite.
Topping Ideas to Try
Every kitchen session turns up a new favorite way to finish these—chopped strawberries bring a burst of color, and crushed pistachios add an irresistible crunch. Once, I tried a zigzag of caramel and a friend jokingly declared me a dessert genius. My sister likes a dusting of cocoa powder and a few sea salt flakes for contrast. Tiny dollops of whipped cream make them look bakery-ready, even if you’re just serving family. Don’t be afraid to mix, match, and get playful with the extras.
What I’ve Learned from Mini Cheesecakes
Cooking these in mini muffin tins is forgiving—mistakes vanish with the first bite, and nobody seems to mind if a crust cracks or filling overflows. There’s a rhythm to the process, and it feels like every batch brings a new trick or shortcut. Patience while cooling is rewarded every time, so don’t rush it.
- Swap in gluten-free cookies if needed—nobody will spot the difference.
- Use a piping bag for cleaner, speedier filling.
- If you overbake, just add an extra (generous) topping to hide the evidence.
 Save
Save 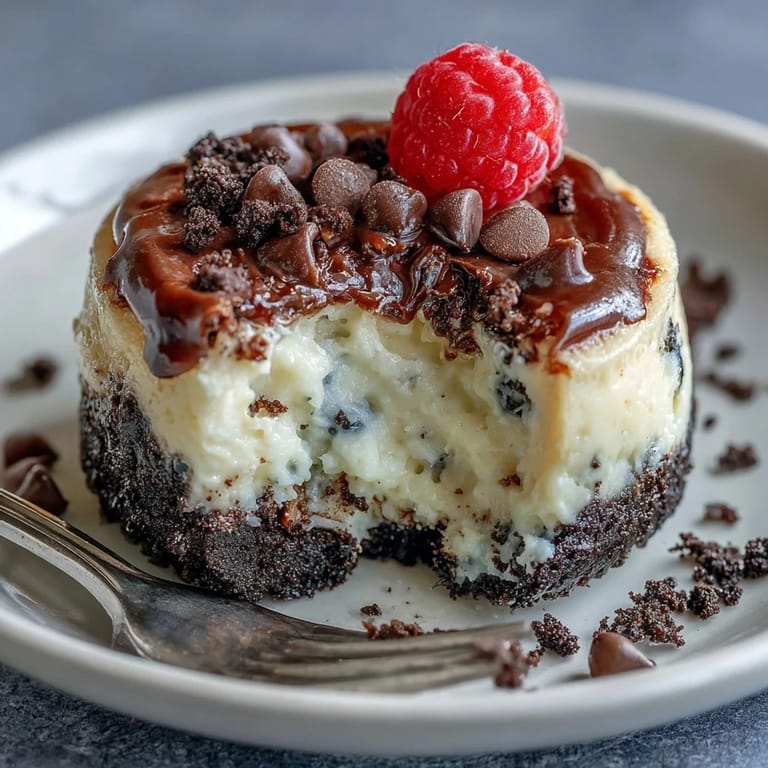 Save
Save Making these mini cheesecakes has become a little ritual I look forward to, especially when sharing with friends. I hope they add a spark of joy to your kitchen, one sweet bite at a time.
Recipe Questions & Answers
- → How do I prevent lumps in the filling?
Start with fully softened cream cheese and beat it until smooth before adding sugar. Add eggs one at a time and scrape the bowl often; room-temperature ingredients blend more uniformly and reduce lumps.
- → How can I tell when the bites are done baking?
The edges should be set and the centers slightly jiggly when you gently shake the pan. They will firm up during cooling and chilling, so avoid overbaking to keep a creamy texture.
- → Can I make a gluten-free version?
Yes. Substitute gluten-free chocolate sandwich cookies for the Oreos and process them the same way for the crust. Confirm the cookies are certified gluten-free if needed for dietary restrictions.
- → What’s the best way to press the crust into cups?
Use the back of a tablespoon or the base of a small measuring spoon to press crumbs firmly and evenly into each liner for a compact crust that holds together after baking.
- → How should I store and freeze the bites?
Refrigerate in an airtight container for up to 4 days. For freezing, flash-freeze on a tray, then transfer to a sealed container; they keep up to 1 month. Thaw in the fridge before serving.
- → Any tips for smooth, crack-free tops?
Avoid high oven temperatures and don't overmix once eggs are added. Bake until centers are just set and allow gradual cooling at room temperature before chilling to reduce cracks.