Save
Save The first time I made this was on a random Tuesday afternoon when my kitchen felt too quiet and I had a container of cottage cheese that needed using. I'd seen the viral blender trend on my phone and thought, why not try it? Five minutes later, I was holding a spoon over something that actually tasted like creamy, dreamy ice cream. My partner walked in mid-scoop and gave me that look—the one that says both "what are you making?" and "can I have some?" instantly. That moment made me realize cottage cheese wasn't just for savory anymore.
I made a batch on a hot summer evening when friends dropped by unannounced, and I served it with fresh berries and granola. The conversation that night wasn't about how clever the recipe was—it was about how everyone forgot they were eating something unconventional and just enjoyed the moment. That's when I knew this deserved a permanent place in my rotation.
Ingredients
- Full-fat cottage cheese (2 cups): The star that makes this work; full-fat gives you the richness that skim versions can't touch, and the whey blends into a luxurious texture when you really go at it with the blender.
- Honey or maple syrup (1/3 cup): These aren't just sweeteners—they add body and that subtle complexity that makes people pause mid-bite.
- Pure vanilla extract (1 teaspoon): Quality matters here because you're not masking it with sugar overload; use the real stuff.
- Salt (pinch): This tiny amount unlocks all the other flavors and keeps the sweetness from feeling flat.
- Mix-ins (strawberries, chocolate chips, nuts, or nut butter): These are where you make it yours; fold them in gently so they stay distinct rather than getting completely swallowed by the base.
Tired of Takeout? 🥡
Get 10 meals you can make faster than delivery arrives. Seriously.
One email. No spam. Unsubscribe anytime.
Instructions
- Get your base ready:
- Pour the cottage cheese, honey, vanilla, and salt into your blender or food processor. You're about to transform something that looks almost boring into something silky.
- Blend until completely smooth:
- Run it on high speed, stopping once or twice to scrape down the sides with a spatula—those hidden bits stuck to the wall matter. You want zero graininess, which usually takes about 1 to 2 minutes of actual blending time.
- Fold in your chosen mix-ins:
- Use a spatula and be gentle here; you're marbling flavor in, not crushing everything. If you picked multiple add-ins, this is where they each get their moment.
- Transfer to your freezer home:
- Scoop everything into a freezer-safe container and smooth the top with your spatula. This small act of tidiness makes it easier to scoop later.
- Freeze with patience:
- Give it 2 to 4 hours depending on your freezer's mood. The texture should go from soft to firm, like actual ice cream you can scoop without breaking your wrist.
- Let it soften just right:
- Pull it from the freezer 5 to 10 minutes before serving so it becomes scoopable without being melting. This step is underrated but changes everything.
 Save
Save There's something quietly satisfying about serving homemade ice cream that took ten minutes of active work but tastes like you planned it all week. My kids have stopped asking if it's "healthy" and started asking when I'm making it again, which feels like the truest compliment.
Flavor Variations That Actually Work
Once you nail the base, the real fun begins. I've swirled in caramel sauce before freezing for ribbons of deep, buttery sweetness, and I've blended in unsweetened cocoa powder (about 2 tablespoons) to make a chocolate version that tastes almost decadent. Fruit preserves create a ripple effect if you layer them in before the final freeze, and honestly, even a tablespoon of instant espresso powder transforms this into something you'd find at a fancy shop.
The Science of Why This Works Better Than You'd Expect
Cottage cheese has this magical protein structure that, when blended, creates tiny fat and casein particles suspended in liquid. That's literally the foundation of ice cream. The honey adds viscosity and prevents large ice crystals from forming, which is why this texture stays creamy even after freezing. When people taste this and say "wait, is this actually cottage cheese?" that's the moment the science becomes irrelevant—you've just made magic in a blender.
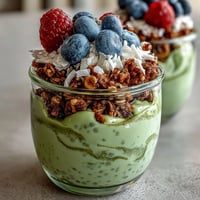
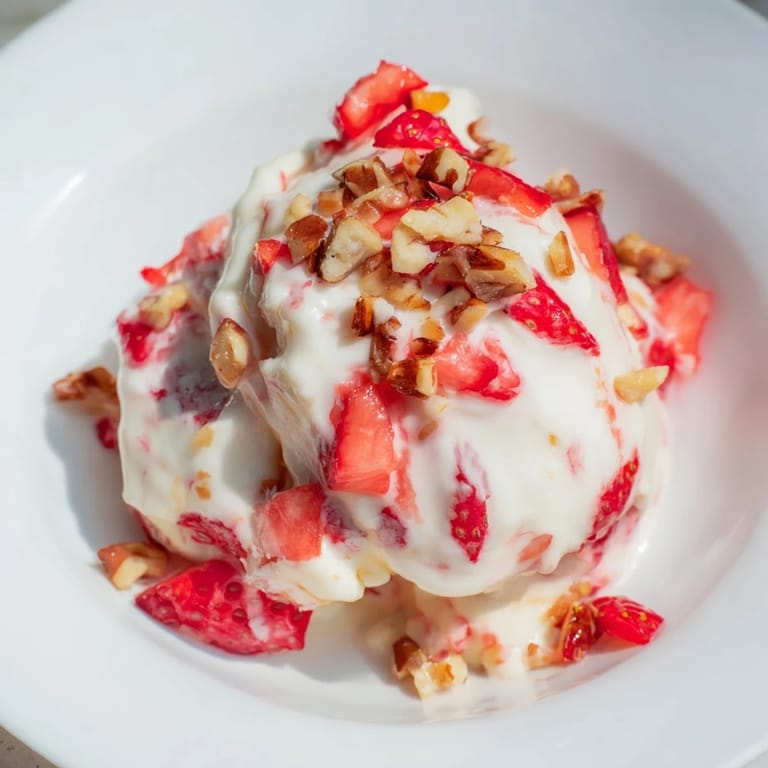
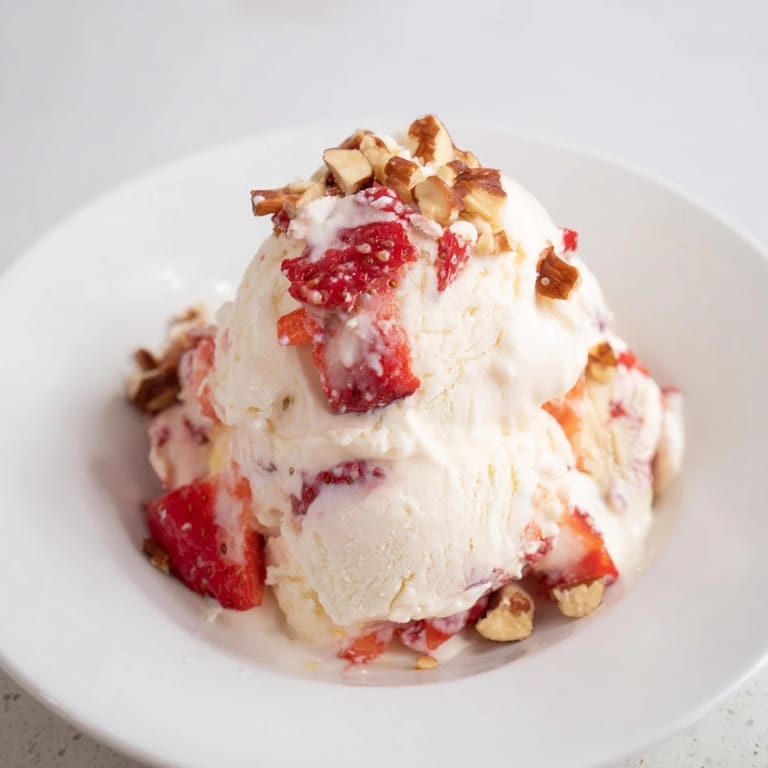
Serving Ideas and Final Touches
This ice cream plays well with others. Top it with granola for crunch, a scatter of fresh berries for brightness, or even a drizzle of chocolate sauce if you're feeling less health-conscious that day. I've served it in bowls at dinner parties and no one ever knew it started as cottage cheese until someone asked for the recipe.
- Let it sit for exactly the right amount of time—frozen solid is hard to scoop, but a little too soft feels sloppy.
- Make it the day before a gathering if you want one less thing to fuss with when people arrive.
- Store it in an airtight container so it doesn't pick up freezer flavors or develop ice crystals on top.
 Save
Save This recipe sits at that perfect intersection where something that sounds unusual becomes your go-to dessert. Give it a chance, trust the process, and enjoy the small joy of a creamy spoonful that tastes like care.
Recipe Questions & Answers
- → Can I use low-fat cottage cheese?
Low-fat varieties can be used, but the final texture may be less creamy and rich compared to full-fat cottage cheese.
- → How do the mix-ins affect freezing?
Mix-ins like berries or nuts add texture and flavor but may slightly alter the freezing consistency. Add them right before freezing for best results.
- → Is a blender necessary to prepare?
Yes, a high-speed blender or food processor ensures the cottage cheese becomes smooth and creamy, creating a luscious base.
- → Can I make chocolate flavor variations?
Adding unsweetened cocoa powder blends well for a chocolate variant without compromising texture.
- → How long does it take to freeze properly?
Freeze the mixture for 2-4 hours until firm enough to scoop. Let sit at room temperature for 5-10 minutes before serving.